Table top terrain - Fallen statue

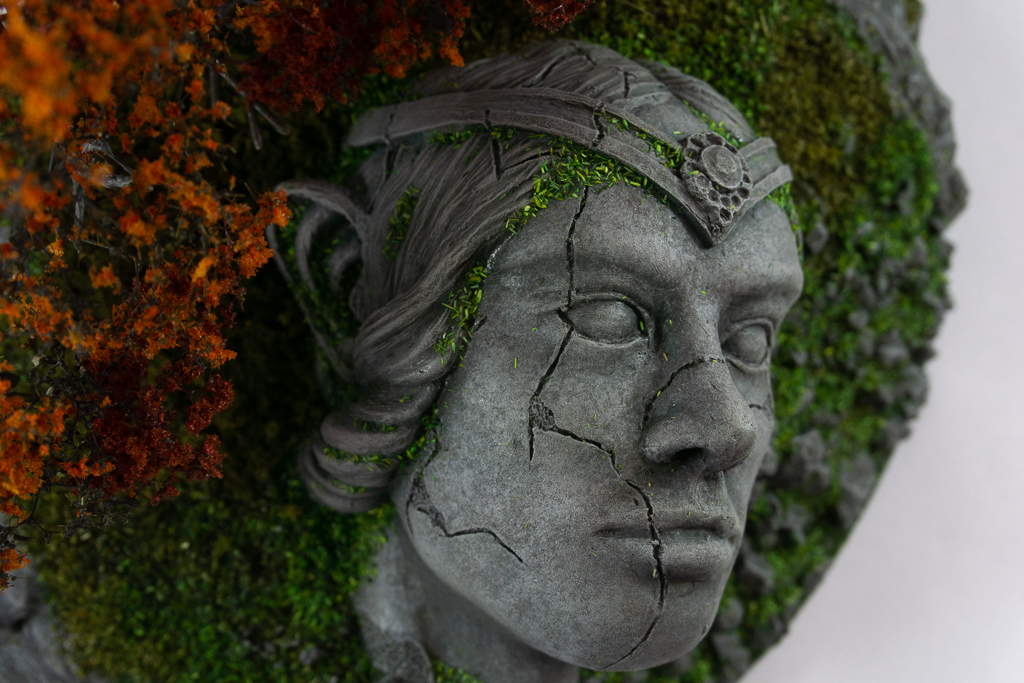
When I first started painting miniatures, I knew right the way that terrain was something that I wanted to try out. I wanted to make a piece that required me to sculpt with clay and a statue would suit perfectly for this. I took some inspiration from Lord of the Rings and decided on a fallen statue head.
To sculpt the head I used Super Sculpey. My toolbox was fairly limited, all I used was a rubber modelling tool from FIMO and some steal wire that I twisted to make a pointy end that I could scratch and carve with. I did order a couple of dental tools to create finer details with. However the delivery was super slow and by the time I had them at my doorstep the sculpture was already done.
To make the face smooth as a baby's bottom I used, well... baby oil actually. The clay is oil based, so lightly rubbing some baby oil over it smooths it up.

To build up the terrain I used expandable foam as a base. It's fairly cheap and easy to get by if you live in a large city like I do. When using it however, you need to empty the hole can in one go (at least the brand that I bought). My girlfriend did think it looked pretty odd when she saw me covering our entire balcony floor with piles of expandable foam. At one point she even asked me what the hell I was doing. I got around 12 piles out of the can, I ended up using one of them... I now have foam enough for years to come.
You can find a tutorial on how too use expandable foam for terrain here.

I then hit everything with a primer "Mechanicus standard grey" to be precise. There are techniques to paint the plaster rocks with just washes, and in a future project I will probably give that a shot. But because I had so many different materials (clay, plaster and natural stones) painting them in the same way would give the most unified look.

To paint the head I used a dry brush, but instead of dry brushing it I lightly dabbed the paint on as if I was using a sponge. Starting with my darkest grey going brighter and brighter. I then hit the whole model with Agrax Earthshade and repeated the whole process, but this time much lighter.
Colors
- Eshin Grey
- Dawnstone
- Administratum Grey
- Agrax Earthshade
For the the rock faces and the stones in the front I used a regular dry brush technique. Still using the same colors, only difference being that I skipped the Eshin Grey.
To flock the ground I bought a "Scatter Material" set from Noch with a bunch of different colors. The process are pretty simple here. Just smash on a bunch of glue, sprinkle the scatter material all over the place and tap off the excess - by the end of it your workstation will be in a serious mess.

The trees turned out to be quite the challenge. even though the final tree wasn't that complicated to build at all.
My first attempt was to do a wire tree. Although it took a lot of time, I manage to twist together a pretty decent looking tree trunk. But when I was about to glue on the flocking, the spray glue that I bought created strings all over the place and well.. it didn't really look like a tree anymore, so I just tossed the ugly thing in the bin and tried to forget about it as fast as possible.
I really liked the idea of being able to build everything from scratch, but twisting up another tree would be way to time-consuming so for my second attempt I bought some Tree Armatures and Fine Leaf Foliage from Woodland Scenics. I did a super fast and dirty paint job to the tree armatures and glued on the foliage using superglue. I then drilled small wholes in the terrain and attached the trees with another drop of superglue.
As a final step I scattered some Coarse Turf from Woodland Scenics under the trees to blend them with the terrain.


Kommentarer
Skicka en kommentar